choose roofing contractor
Finding A Roofing Company

Do you need a new roof for your business? You may feel you need help choosing the right roofing contractor. Right Way Roofing Arizona checks off all the boxes of a superior roofing company. 

Get Your Roof Inspected Today

We don’t expect you to take our word for it. Keep reading to discover all the tips you need and how to choose a good commercial roofing contractor.

Hiring Your Roofer: Tips 

The following tips help ensure you get high-quality work from your contractor. A company that excels in all these areas can meet your expectations for service. 

History and Reputation

One of the best things you can do if you’re wondering how to choose a roofing company is to examine the company’s history and reputation. The longer a company has been in business, the better service they provide. You should also look at the company’s reputation by reading reviews on third-party websites such as Google.

Financial Stability

Do you know how to choose a good roofing contractor? Prioritize a company that doesn’t have excessive debt. This means they can stand by their warranty and aren’t at risk of bankruptcy.

You can determine their financial stability by asking about their:

  • Annual revenue
  • Net worth
  • Working capital

Safety Plan

Roofing is a dangerous business. Contractors that don’t have adequate safety plans can cause trouble. Ask about the following:

  • How many hours do your employees work every week?
  • Are you fully licensed and properly insured?
  • Are your workers trained in first aid and safety procedures?
  • What is your safety incident rate?

References

Don’t forget to ask for references if you’re wondering how to choose a good commercial roofing contractor. You can check with the roofing contractor or ask neighbors who they’ve used. Always ask multiple people for the best results.

What To Ask Your Commercial Roofer 

If you’re wondering how to choose a roofing company, consider asking them these important questions before you book them:

Will you give a quote? You deserve an upfront estimate so you can make an informed decision about the costs. The vast majority of roofing contractors offer quotes.

Are you licensed and insured? Never work with a company that doesn’t have a full license and insurance. It’s one way you can feel confident they can properly install your roof.

Do you provide guarantees? A potential roofing contractor who offers guarantees adds an extra level of protection and you’ll know they go above and beyond to provide quality service.

What is the time frame? You should find your project’s start and end dates in the estimate. The company shouldn’t have problems ending on the agreed date unless the company experiences a serious setback.

Benefits of Hiring Commercial Roofing Services 

Keep the benefits in mind if you’re wondering how to choose a roofing contractor. This helps you focus on choosing the best one. The benefits include:

Expertise and experience: You’ll know they provide quality workmanship if they have extensive training and experience in the industry.

Licensed and insured: Contractors must carry licenses from their state and many also have additional insurance that protects them from potential damages.

Quality materials: The best roofers use the highest quality materials that ensure your roof lasts as long as possible. They let you choose from among several options.

Cost-effective solutions: Competitive pricing combined with high-quality products that stand the test of time ensure you get the most out of this investment.

Accurate estimates: Experienced roofers can give you an accurate estimate so you can correctly budget for your roofing project.

Why Are the Best Roofing Contractors Important? 

Are you wondering how to choose a good roofing contractor? Why is choosing the best one important?

Your roof is one of the most important parts of your business and helps protect you and keep you comfortable. They also carry liability insurance. That means if something goes wrong, you’re not responsible for paying for the damages.

How To Find a Licensed Roofing Contractor

The best thing you can do to find a licensed roofing contractor is to perform some online research. When you type in “commercial roofing company near me,” look over the first several results. Then obtain a referral from your network and look at the reviews. Finally, interview each contractor using the tips we’ve discussed and see which one gives the best answers.

The Final Verdict

Now that you know how to choose a roofing contractor for your business, check out Right Way Roofing. We’re certain we’ll stand up to your scrutiny and exceed your expectations. Your business deserves the best, and that’s us.

Get a FREE roof inspection today.

Roof Estimate
Roof Estimate

Do you need roof repairs or replacement and you’re wondering how to obtain an accurate estimate? At Right Way Roofing, we stand out among roofing contractors because we provide detailed, upfront roofing estimates.

Never book a roofing job without first obtaining an estimate, because it helps you make an informed decision and choose the best contractor. Keep reading to learn everything you should know.

Get a FREE roof estimate today.

How Do You Know If You Need a Roof Replacement?

How do you know when you need roofing estimates for complete replacement? Look for the following signs:


    • You see damaged shingles or tiles, such as cracking or curling
    • Your shingles or tiles are loose or missing
    • You notice a sag or dip in the roof
    • You find many granules from your shingles in your gutters
    • Mold or mildew grows on your roof or you notice dark spots
    • Nail heads frequently stick out from your shingles
    • You find water damage in your attic or on your ceiling
    • You see staining or water damage under the eaves
    • You have a roof over 15 years old
    • You’ve seen a rise in your heating or cooling bills

Measure the Roof

The next task for your roofing contractor is measuring your roof. They’ll determine the square footage so they know how many roofing squares you need.

In general, in addition to labor, the biggest factor in determining the cost of your roof is its size and the materials you use.

Important Details of a Roofing Estimate

Roofing quotes aren’t just a verbal agreement about prices. You should receive a detailed written document and samples of the material the contractor is proposing to install on your new roof. Before you commit to a roofing estimate, ensure it has all the important details such as:

    • Contact information: The document should contain the company name, address, phone number, and email (where applicable).
    • Work description: You should see in writing a detailed description of the work the company will perform.
    • Materials: An itemized list of materials helps ensure the company doesn’t charge you for materials you don’t need.
    • Cost: You should see the total cost of the project. Remember, the lowest price doesn’t mean you’ll receive the highest quality work.
    • Warranty: The estimate should list the warranties and guarantees you’ll receive. If the company doesn’t offer any, find a different contractor.

Red Flags To Look Out for on Your Roof Estimate

If you experience any of the following issues during the estimate process, you should look for a different contractor:

    • No samples given: The roofing estimate should always be transparent with the materials used, ensuring you can verify their quality and the expected durability.
    • Hiding fine print: You should see the fine print on your estimate, and if you don’t, it’s a huge red flag.
    • You only receive a price: If all you receive for your estimate is a price, you’re missing out on a significant amount of important information.
    • Hidden fees: Extra expenses occur, but your contractor should discuss that possibility with you.
    • No warranty information: You deserve to know what warranties you’ll receive so you can make a good decision.
    • Lack of communication: The roofing company should feel okay sitting down with you explaining the estimate and answering any questions. If they don’t do this, they don’t have the customer service you need or may be hiding something.

Get a Free Roof Replacement Estimate From Right Way Roofing

Whether you need residential roofing or commercial roofing, Right Way Roofing always provides detailed and accurate roofing estimates. You’ll love working with our friendly, professional, and knowledgeable staff. We’re standing by to take your call. Get your FREE roof inspection now.


Anatomy of roof
Roof Components

Have a Pitched Roof? Here’s Everything You Need To Know & More

You may not think about the roof over your head, but imagine you were in a building or home without one. Pretty weird, right? A roof is more than essential, but few people know the anatomy of one. If you’re interested in learning about your roof, including pitched roofs, then Right Way Roofing is here to help. In this blog, we’ll go over the ins and outs of a roof and the importance of roof inspections and cleanings.  

Service Areas

At Right Way Roofing, we offer our services to residential and commercial properties in Phoenix, Tempe, Mesa, Chandler, and even the West Valley, including Glendale, Surprise, and Peoria.

We Serve Entire Phoenix Valley

Don’t see your city? Call us to see if we service your area.

What Is a Pitched Roof?

A pitched roof is a type of roof characterized by its steep slope or angle. Unlike flat roofs, which have minimal to no slope, pitched roofs have a noticeable incline. This incline is created by the roof’s rafters, which rise at an angle from the walls of the building to meet at the ridge or peak of the roof. These roofs are sought after for their durability and longevity, making them the most common residential roof style in Arizona.

Various Roof Shapes

Your home or business in Arizona may have a unique roof structure, but our professionals can take on any roof shape, including:

  • Mono-Pitch Roofs
  • Double Pitch Roofs or Gable Roofs
  • Hip Roofs
  • Flat Roofs
  • Purlin Roofs
  • Slant Roofs
  • Couple Roofs
  • Couple Close Roofs
  • Collar Beam Roofs
  • King Post Roofs

The most common roof types in Arizona are variations of pitched roofs, where two or more sides of the roof meet at the top to form a tent-like shape.

Various Roof Shapes

What Makes up a Roof: Your Roof’s Components

If you’ve been scrolling through our website or other roofing pages, you may have come across some roofing terms that you’re unfamiliar with. There are many components that make up a roof; the most common ones you should know are: 

Roof Shingles

Roof shingles serve as the primary shield for your roof. They’re flat pieces that are laid on top of each other until the entire roof’s surface is covered. The most common material for shingles is asphalt due to its superior qualities. However, roofing shingles can also be made of fiberglass or wood based on your aesthetic preferences. 

Eaves

Eaves are the overhanging edges of a roof, designed to direct rainwater away from the building’s exterior walls. They also offer sun protection (which is crucial in Arizona) and can be decorated for architectural flair. 

Soffit

Soffits are horizontal strips of timber located beneath the eaves.  Soffits facilitate adequate ventilation through soffit vents to circulate air in the building. Keep in mind that soffits are prone to water damage if gutters are insufficient or the building’s waterproofing is subpar. 

Flashing

Flashing in a roof consists of metal strips installed to seal joints between roof coverings and other structural elements. Flashings prevent moisture from entering a wall and roof through joints in copings, parapet walls, and other penetrations through the roof plane.

Ridge

The ridge is considered the highest point where two roof slopes meet in a roof. It’s important to make sure this area has a watertight seal since it’s susceptible to weather damage.  

Fascia

The fascia of a roof describes the board or foundation that attaches to the trim of a roof. The fascia connects the walls to the rafters, and the gutters to the roof. The most common and cheapest fascia material is wood, but it’s also the most susceptible to water damage, rot, and deterioration. 

Rafter

Critical for pitched roofs, rafters support the roof’s structure and help regulate attic temperature. Wooden rafters are common in residential construction, while steel is preferred for commercial buildings.

Drip Edge

Drip edge encourages proper drainage by guiding rainwater into the gutters or away from the fascia. This is an important component of your roof that prevents damage. 

Underlayment

The function and importance of underlayment vary depending on whether it’s a tile or shingle roof. While quality and durability are important for both types of roofs, tile roofs can encounter issues such as cracks or missing tiles, relying on the underlayment to function as the roof system and protect against water leaks.

Understanding these different roofing terms will help you not only understand what’s covering your head but the next time you need a cleaning or repair service, you’re equipped with the right knowledge.

Learn About Your Roof With Right Way Roofing

Knowing roof terminology empowers home and business owners to make informed decisions about their roof’s maintenance, repair, and replacement needs. At Right Way Roofing, we want to assist Arizona locals with their roofs, no matter the size, shape, or style. We will guide you through our roof inspection process and ensure a thorough evaluation of every component of your roof.

Asphalt Shingle Roof Installation Costs 2024
Flat Roof Repair, Roofing Types

Asphalt shingle roofs are the most popular choice for homeowners due to their affordability, versatility, and ease of installation.

Factors Affecting Cost:

  • Roof size: Naturally, larger roofs require more materials and labor, pushing the cost up. Expect a range of:

    • Small roofs (around 1,000 sq ft): $3,000-$5,000
    • Medium-sized roofs (around 2,500 sq ft): $5,000-$8,000
    • Large roofs (around 5,000 sq ft): $8,000-$12,000+ (can even reach $15,000+ for complex shapes)
  • Shingle type: Different shingle types vary in price and lifespan. Three-tab shingles are the most affordable, while architectural shingles offer a more premium look and longer lifespan but come at a higher cost.

  • Roof pitch: Steeper roofs require more safety precautions and specialized skills, increasing the labor cost.

  • Tear-off and disposal: If your existing roof needs removal, it adds to the overall cost.

  • Location and labor costs: Prices can vary depending on your region and the availability of experienced roofers.

  • Permits and inspections: Local requirements can add additional fees.

Cost Range:

Asphalt shingle roof installation typically costs between $3.00 and $5.00 per square foot, including both material and labor. This translates to an average total cost of:

  • Small roofs (around 1,000 sq ft): $3,000-$5,000
  • Medium-sized roofs (around 2,500 sq ft): $5,000-$8,000
  • Large roofs (around 5,000 sq ft): $8,000-$12,000+

If you live in Mesa, Phoenix, Chandler, or the surrounding cities in the Phoenix area and need a new roof; Right Way Roofing, Inc. can help! We offer residential roof installation and commercial roof installation in Phoenix & Mesa, Arizona. As a 3rd generation roofing company that’s family owned and operated we provide nothing but the very best roofing service for our friends and neighbors in Arizona. We use the finest underlayment, install the best roofing, and see to it you get the very best customer service from our highly experienced and trained team. We provide free inspections* to property owners to help them understand their roof’s condition and what needs to be done to ensure it’s protecting the home and its contents.

Categories

RIGHT WAY ROOFING IS A RESIDENTIAL AND COMMERCIAL ROOFING CONTRACTOR LOCATED IN PHOENIX ARIZONA

Call us TODAY! East Valley: 480-232-5458 or West Valley: 602-299-8851

Spray Foam Roofing Costs Arizona
Spray Foam Roofing

Spray foam roofing, with its seamless application and impressive insulating properties, can be a tempting choice for your roof. However, before taking the plunge, understanding the cost factors is crucial for informed decision-making.

Factors Affecting Cost:

  • Roof size: Naturally, larger roofs require more material and labor, pushing the price up. Expect a range of:

    • Small roofs (around 1,000 sq ft): $6,500-$9,000
    • Medium-sized roofs (around 2,500 sq ft): $9,000-$12,000
    • Large roofs (around 5,000 sq ft): $12,000-$15,000+ (can even reach $20,000+ for complex shapes)
  • Foam thickness: Thicker foam provides better insulation but increases the cost per square foot. The average cost per inch of foam is around $2.25.

  • Material type: Different types of foam have varying costs and properties. Polyurethane foam is the most common, while polyurea offers superior waterproofing but comes at a premium.

  • Roof condition: If your existing roof requires repairs or removal before applying the foam, it adds to the overall cost.

  • Location and labor costs: Prices can vary depending on your region and the availability of experienced applicators.

  • Warranty: Longer warranties offer peace of mind but might be more expensive.

Cost Range:

It’s important to understand that spray foam roofing is generally more expensive than traditional roofing options like asphalt shingles. Here’s a rough estimate:

  • Average cost per square foot (including material and labor): $3.50-$7.00
  • Total cost: $6,500-$11,600 on average, with significant variation based on the factors mentioned above.

Tips for Saving:

  • Get quotes from multiple contractors and compare prices.
  • Consider the long-term benefits of energy savings due to improved insulation.
  • Opt for standard foam thickness is sufficient for your needs.
  • Explore the possibility of rebates or incentives offered in your area.
  • Factor in potential maintenance costs over the lifespan of the roof.

Points To Consider

  • Spray foam roofing offers excellent insulation, durability, and longevity, potentially offsetting the higher initial cost through energy savings.
  • Investing in quality materials and experienced applicators ensures optimal performance and lifespan.
  • Balancing cost with desired features and potential long-term benefits can help you make an informed decision about spray foam roofing for your specific needs.

Free Spray Foam Roofing Estimates In Phoenix

Get a free spray foam roofing estimate in Phoenix by getting in touch with Right Way Roofing, Inc. Right Way Roofing, Inc. is the Phoenix Valley’s premier spray foam roofing contractor with years of experience in the roofing industry.

RIGHT WAY ROOFING IS A RESIDENTIAL AND COMMERCIAL ROOFING CONTRACTOR LOCATED IN PHOENIX ARIZONA

Call us TODAY! East Valley: 480-232-5458 or West Valley: 602-299-8851

Roof Life Expectancy Report
Best Roofing Types, Roofing Types

Home ownership comes with questions like, “what is average roof life?” and “How long will my roof last?”. Owning a home is likely the largest investment the average American makes and roof life expectancy is a big deal. Your roof prevents water from ruining your home and it’s contents. In this roof life expectancy report, we explore the most popular types of roofing and average life expectancy based on materials. While the materials are a major factor in durability so are the quality of installation and maintenance.

You can generally determine what the life span of a roof is going to be based on the type of material that was used in covering it. Learn more about the roof life expectancy of different types of roofing systems below. With the right information, you’ll know when you might need services such as tile roof repair, shingle roof repair, foam roof repair and others in the Phoenix Valley.

Shingles Roof Life Expectancy

There are two different options available for roof shingles, they are asphalt compositions, these are cover in either crushed stone or fiberglass. Fortunately, asphalt shingles are going to be less expensive, with a low-maintenance, and they are relatively easy to install. However, the material of asphalt shingles does not hold up to winds or heavy rains like other materials can. Asphalt shingles average lifespan is approximately 20 to 40 years, this depends on the manufacturer, yet, most of the warranties are only 15 to 25 years. Fiberglass shingles will cost a little more, however, these can last as long as 50 years and sometimes more.

Shake Roof Life Expectancy

Wood shingles and shakes are going to be made of pressure treated wood or else cedar, and they are going to be more expensive than asphalt shingles. The wood shingles and shakes will require regular maintenance, and they are available in a pre-stained or the aged finishes, these give a roof the weathered appearance. Wood shingles will typically resist insects and rot. These have an average lifespan of approximately 30 years. Copper is another choice. It will give the appearance of the old world, and as it is getting older it will turn to a pale green patina. Lasting up to 100 years or more.

Metal Roof Life Expectancy

There is also metal roofing. This type of roofing is made from galvanized or a stainless steel sheeting, however, the copper sheets & tiles are yet, another option. How much the steel roofing is going to cost will depend on your roof’s sheet profile, which finish is to be applied, and your roof’s shape and size, of course, it offers durability, having a lifespan of up to 50 years and more. Copper also gives the roof that Old World appearance, and also turns a pale green patina with age, having a lifespan of up to 100 years or more.

Tiles Roof Life Expectancy

Stone tiles will generally be made from clay, slate, terracotta, and concrete. This roofing will resist fading that can occur from the sunlight, it is able to withstand strong winds, and take the heavy rainfalls, however, these will require professional installation and are extremely heavy. Due to the overall durability and strength, a stone tile roof is long-lasting. Clay tile has a lifespan of about 40-60 years, while concrete and slate tiles provide a 50 to 100-year lifespan.

Flat Roof Life Expectancy

A flat roof’s lifespan will depend on the materials used to cover it. The asphalt coverings have two layers of felt in a combination with molten asphalt, then it is topped using a coating of gravel. Which is a less expensive option on flat roofs, and only lasts around 10 years. Another option would be the rubber roofing. There is also the flat roof option of thermoplastic olefin membrane, it is made of ethylene propylene rubber mixed with filler materials. This type has a lifespan of about 40 to 50 years, and it resists punctures, UV rays, and tears.

Learn More About Roof Installation & Life Expectancy

Learn more about roof installation in Arizona and ask our experts questions about life expectancy/benefits of different types of roofing systems. We offer tile roof repair, foam roof repair, shingle roof repair and more in the Phoenix Valley!

Categories

RIGHT WAY ROOFING IS A RESIDENTIAL AND COMMERCIAL ROOFING CONTRACTOR LOCATED IN PHOENIX ARIZONA

Call us TODAY! East Valley: 480-232-5458 or West Valley: 602-299-8851

How-to-Fix-Leaks-on-Clay-Tile-Roofs
Uncategorized

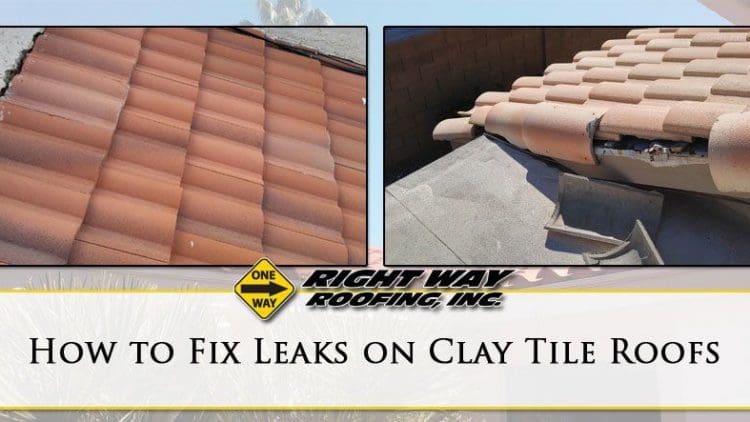
If you’re searching for how to fix leaks on clay tile roofs you’ve likely got a problem on your hands.  Water coming through your roof can lead to damaged insulation, ruined ceilings, and needing to replace sheetrock, carpet, and much more.  Clay roof tile can be susceptible to leaks which are caused by various problems with the installation methods, tile itself, and age. The way that the leak can be repaired will differ based on the cause of the issue.

How To Repair A Tile Roof

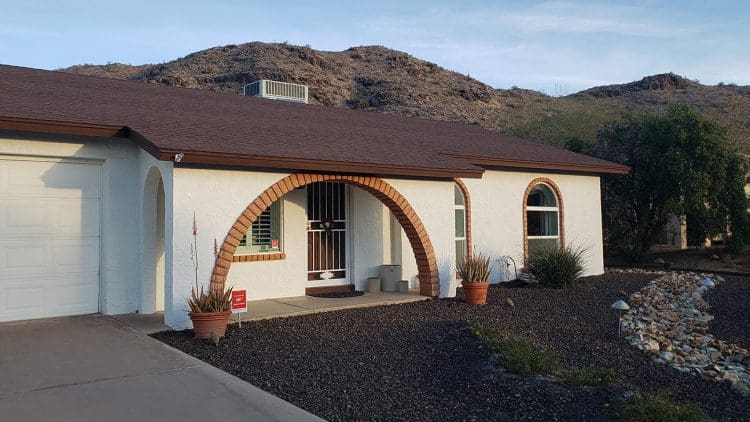
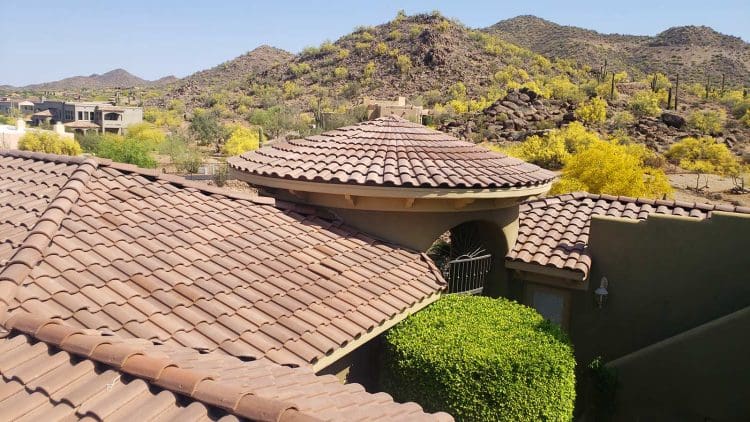
Tile roofing is durable and adds great curb appeal to your home.  All roofing will need some maintenance and repairs at some point.  The following steps show you how to repair a tile roof.  Should you not have the tools or time our team is always ready to help you repair your tile roof anywhere in the Phoenix Valley.

Tools and Materials

Keep in mind that the tools and materials that are needed will depend on the cause of the leak.

  • Nails
  • Wet saw
  • Hanger strap
  • Pry bar
  • Hammer
  • RT-600 Tile Roof Sealer in Terracotta color
  • Caulk gun
  • Waterproof membrane
  • Mortar

Step 1: Identify The Cause

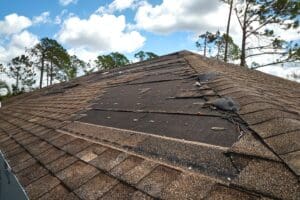
Clay tiles may leak because of several reasons. While some issues will go beyond your roof and will be related to other things to do with roofing or the installation methods, some of the common issues with clay tiles are:

  1. Broken tiles
  2. Cracked tiles
  3. Collection of debris on the roof valley
  4. Worn out or defective waterproof membrane

In order to fix the leak, you will have to fix the issue that applies to you. Keep in mind that the clay roof tiles will break easily under pressure, so be sure to be careful whenever you are walking on your roof to find the cause of the leak.

Step 2: Fixing the Membrane

If the issue is in the waterproof membrane, then you will have to remove the existing tiles and replace the membrane with a new one. Then you will have to retile your roof. You may need the help of a professional for the removal and re-tiling.

Step 3. Removing the Debris

The roof valleys, especially closed ones will collect a lot of debris. This can cause leaks. To remove the debris, so there is no more leaking, you will have to remove the tiles from the area, then clean the area out, and lastly reinstall the tiles. You may consider wanting to covertyour roof valleys to be open to help to avoid any collection of debris within the future.

Step 4. Fixing cracks

If you happen to notice any fine cracks within the tiles, then you may repair them by applying RT-600 on the cracked tiles and then allow it to spread on the whole tile and let it dry.

Step 5. Fixing broken tiles

Tiles that have large cracks or are broken will need to be replaced in order to fix the leak. You will need to remove the damaged tiles using a pry bar. Use a hammer to help with the removal, but be careful to make sure that you will not damage the good tiles. If the roof is old, then the chances are that the tiles have been fixed using mortar. If this is the case, place the new tiles and use mortar to seal them in place.

More current rooftops will have nails that will hold the tiles set up. On the off chance that that is the situation, you will require a holder lash. Place the new tile on the holder lash, and after that hang it where the new tile will need to be fitted. Ensure that you don’t force the tile in place. Use a wet saw to cut the edges, if it is needed. Next, hammer the nails into the top of the tiles, which will secure the new tile to the roof. Apply mortar or RT-600 to the sides to make sure that there is a complete seal.

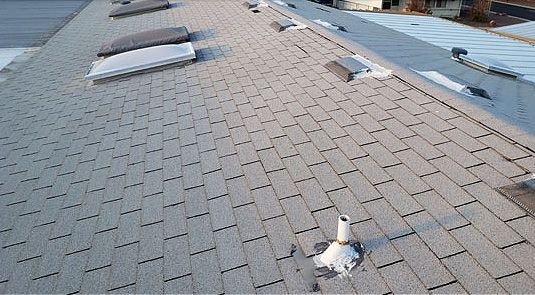
How to Repair Leaking Concrete Tile Roofs

Even though it may be installed correctly, a concrete tile roof will normally be durable enough to be enough for your home, but this doesn’t always stop the issues that can come up if it is hit by a tree branch or bad weather. By following the require steps, you will find that it is quite easy to replace any leaking tile.

Step 1. Inspect the Roof

You will start the repair process by examining the roof tiles to find just how bad the damage is. This will let you know how many tiles need to be replaced. Even though you may be able to see the damaged tiles from the ground, a proper inspection needs to be done so that you can see the tiles up close. When you do this, you can make sure that you don’t miss any tiles that are cracked and appear that nothing is wrong with them.

You may not be able to access the roof from the attic, you could get an idea about how bad the damage is by checking the roof in the attic.

Step 2. Gather your Equipment

Once you know how many tiles are needed, you can make sure that you get plenty of replacements. If needed, remove the cracked or broken tiles from the roof and take it with you when you purchase new ones. Gather all the tools and equipment that you will need to do the job, including shoes that have the right soles that will let you move around without slipping or breaking more tiles.

Step 3. Remove the Damaged Tiles

Make your way up the ladder with the tools and make your way to the leaking area of the roof. If multiple tiles need to be replaced, start at one end and then work your way across. You will want to identify the first tile to remove and then lift it carefully above just enough to allow a crowbar to slide beneath it. Give the length of the crowbar a chance to lay on it askew and to one side on the rooftop that is in place. You would then be able to lift the tile to one side of the one being expelled and keep it held up with the other. Then simply slide the tile out, although you may need to raise it up first to unhook it from the holding.

Step 4. Replacing the Tiles

To replace the tiles on the roof, reverse the procedure that you used to remove the tiles. Your crowbars should provide plenty of space to see the holdings and adjust them if needed. Otherwise, it will be easy to slide the tile into place. Once you are happy with the fit, hold onto the raised tiles and slide the first crowbar from where it was, while avoiding scratching the tiles, and do the same with the other crowbar. If broken tiles have caused damage to the flashing, then make sure you replace that too.

Repairing the Flashing for Clay Tile Roofs

Being able to know how to repair the flashing on your clay tile roof can save your home from a lot of water damage. The most common areas for flashing are in skylights, chimneys, ridges, roof penetrations and valleys and they are used to waterproof the roof. Flashing is the last defensive stop before water damage.

To effectively repair this, the flashing will need to be replaced. The roof and chimney are exposed to the elements and over time a lot of wear and tear happens. Climbing on the roof will save you money on a roofer. Make sure to be safe and invest in safety equipment before making that climb.

Step 1. Removing the Tiles

Put your gloves and using the slate ripped, remove the tiles around the flashing. To get access to these tiles, you may need to remove tiles around them.

Step 2. Cleaning Up

Once the tiles have been removed, there are things that can be found. Broken tiles, dirt, and debris will need to be picked up and removed. Be sure to remove the old flashing. There may be tar that was used with the old flashing and try to remove as much as possible. Because the flashing is metal, try not to get cut.

Step 3. Installing the Base Support

There will be a copper sheet metal flashing to be nailed down, which becomes a base support for the new flashing. It also helps to prevent sagging under the lower roof tile. Using the support, it is another layer that water will have to get through to reach your home.

Step 4. Installing New Flashing

Use copper nails to secure the flashing and hammer them to the roof deck. Be sure that sides are bent, and that it is both back and up as this stops water from flowing to the sides. The water will need to be sent away from areas where it can seep in. There are some homes that will have pipe on the roof along with the chimney. It is important to install flashing on the pipe as well. Use caulking to attach the flashing to the pipe and the new flashing needs to be taller than the pipe. Use straight cutting tin snips to cut the top just above the old pipe. Bend it into the top of the pipe as this helps to create a water tight seal.

Step 5. Replace the Roof Tiles

Trim and install the new tiles. The new clay roof tiles need to match the ones on the roof. Use nails to secure them. When replacing them, the tile needs to be laid down in the same direction and fashion. It is best to work from left to right.

Clay tiles are quite unique, as you will need to have extra care when handling them. Taking care of your roof is important, both for the interior and exterior of your home.

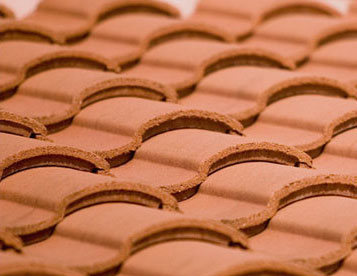
How to Repair a Concrete Tile Roof

A concrete tile rooftop is both stylishly lovely and exceptionally handy. It for the most part has a long time span of usability, however it can break because of extraordinary temperature conditions. In such a circumstance there is no other option than to repair or supplant the harmed tiles. Repairing a solid tile rooftop isn’t an unimaginable assignment. With the correct devices, this guide and taking the essential security insurances, you can carry out the activity yourself. Here’s the manner by which to repair a concrete tile rooftop.

Step 1. Safety First

Before you begin repairing your solid tile rooftop, ensure you have your cowhide gloves and defensive eye glasses on. Utilize the stepping stool to get on the rooftop. Ensure you chip away at the harmed tiles deliberately. While treading, you should be mindful so as not to harm different ranges on the solid tile rooftop.

Step 2. Replace the Tiles

The substitution tile ought to be a correct match to the current solid tile rooftop. You should can get your hands on the tile’s model number and producer subtle elements. Getting the correct kind of tile is of most extreme significance, as a solid tile rooftop takes after a specific example. Getting it from the first producer would be the most secure wagered.

Step 3. Use a Crowbar

Insert the crowbar under the damaged part of the concrete tile. Place it onto the left-hand tip of tile that is damaged.

Step 4. Removing Damaged Tiles

Remove the damaged tiles by applying slight pressure on the crowbar. This forces the tile up and you can remove it.

Step 5. Tiles Above the Damaged Tiles

Follow steps above to remove the tile directly over the one you just removed.

Step 6. Replacing the Tile

Remove and dispose of the damaged tile. Place a new one in the vacant spot and make sure it is fixed securely on the roof.

Step 7. Secure the Tiles

Most new tiles don’t need nails to hold them in place. Position the tile and align it and then snap it into place.

Step 8. Repeat

Repeat the process of snapping and fixing the tiles until they are all replaced.

Step 9. Finishing

Check again to make sure that all the tiles you replaced are in place firmly. That is all that needs to be done.

Clay Tile Roof Repair: Mistakes you should Avoid

Utilizing the correct techniques to finish aclay tile rooftop repair is an imperative part in ensuring you don’t cause more harm than you proposed to repair. Clay tile rooftops are additionally greatly delicate so it’s critical to take additional care when taking a shot at them. This and other normal errors are imperative to remember before handling your next repair.

Storing Materials Properly

When undertaking a clay tile rooftop repair one of the principal issues you will need to manage is the place to store the materials that are to be utilized as a part of the repair. Albeit brimming with noteworthy appeal and character these rooftops can’t bolster much weight on their surface. With a specific end goal to abstain from harming the great earth rooftop tiles you’ll need to spread the weight out to finish a bigger territory. It’s likewise a smart thought to abstain from stacking different groups one over the other. A decent general guideline is to stack close to two packages together. The best technique is to make an organizing territory on the ground and convey the material to the rooftop as it’s required. Be that as it may, this can’t generally be expert particularly when managing high rooftop lines.

Accessing the Roof

The delicate idea of mud tiles makes getting to the rooftop to play out your repair fairly a precarious suggestion. While putting the augmentation stepping stool against the eave of the rooftop is a smart thought to put assurance between the stepping stool and the rooftop. This will help avoid splitting or chipping any dirt tiles along the edge. Another smart thought is to put a defensive drop material, for example, an old cover, to work off of. Putting away your devices on the exposed mud tiles can cause extra chipping and splitting. Once on the rooftop you should wear non-slip shoes and walk gradually while dispersing your weight equitably. When walking, it’s additionally prescribed to abstain from venturing straightforwardly on the edge of a tile as these are the weakest focuses.

Removing the Old Tiles

When performing clay tile rooftop repair you’ll need to seclude the territory of repair so as not to harm any of the adjoining rooftop tiles. Clay tiles can be harmed by falling trees or simply break after a few periods of weathering. Much of the time, you’ll just need to supplant a couple of tiles to effectively entire the repair. Unpracticed roofers will frequently damage neighboring tiles while attempting to evacuate the damaged ones. To maintain a strategic distance from this situation, utilize a bit of wood to wedge the tile up. This will permit you access to expel the nail holding the harmed tile set up. When breaking separated the harmed tile utilize an etch in conjunction with a mallet. This will give you more control and keep any inadvertent blow-back to existing tiles. By maintaining a strategic distance from these regular slip-ups while expelling an old tile you can guarantee you don’t make more work for yourself.

Clay Tile Roof Leak Repair Service

If you don’t have the tools, time, or desire to fix your leaking clay tile roof, or any other kind of roof, Right Way Roofing, Inc. has you covered.  Our family-owned and operated company has been repairing tile roofing in the Phoenix Valley for 3 generations.  This means we’ve seen it all, and repaired it!  We use the roofing materials for all of our roofing services from installation and maintenance to repair and replacement.  Every visit from our team assures property owners in the Phoenix Valley of the very best roofing services.

Categories

RIGHT WAY ROOFING IS A RESIDENTIAL AND COMMERCIAL ROOFING CONTRACTOR LOCATED IN PHOENIX ARIZONA

Call us TODAY! East Valley: 480-232-5458 or West Valley: 602-299-8851

what are the cheapest and most expensive roofing materials
Tile Roofing, Tile Roofing Repair

The cheapest and most expensive roofing materials are:

  • Asphalt shinglesAsphalt shingles are the most common roofing material in the United States, and they are also the most affordable. They come in a variety of styles and colors, and they can be installed by most homeowners. Asphalt shingles typically last for 15-20 years.
  • Roll roofing – Roll roofing is a type of asphalt roofing that comes in long rolls. It is a less expensive option than asphalt shingles, but it is also less durable. Roll roofing typically lasts for 10-15 years.
  • Metal roofing – Metal roofing is a more expensive option than asphalt shingles, but it is also more durable. Metal roofs can last for 50 years or more. They are also more energy-efficient than asphalt shingles, and they can reflect heat, which can help keep your home cooler in the summer.
  • Wood shingles – Wood shingles are a traditional roofing material that is made from cedar or redwood. They are a more expensive option than asphalt shingles, but they can last for 50 years or more. Wood shingles are also very attractive, and they can add value to your home.

When choosing a roofing material, it is important to consider the cost, durability, energy efficiency, and aesthetic appeal. The cheapest roofing material may not be the best option for your home, but it is a good place to start your search.

Categories

RIGHT WAY ROOFING IS A RESIDENTIAL AND COMMERCIAL ROOFING CONTRACTOR LOCATED IN PHOENIX ARIZONA

Call us TODAY! East Valley: 480-232-5458 or West Valley: 602-299-8851

Best Material for Tile Roofs
Tile Roofing

The best materials for roof tiles depend on various factors, including the climate, architectural style, budget, and personal preferences. Here are some common roofing materials used for tiles, each with its own set of advantages and considerations:

  1. Concrete Tiles

    • Pros: Durable, relatively affordable, low maintenance, available in various styles and colors, fire-resistant.
    • Cons: Heavy, may require additional roof support, can fade over time.
  2. Clay Tiles

    • Pros: Classic and timeless appearance, durable, fire-resistant, low maintenance.
    • Cons: More expensive than some other options, heavier than asphalt shingles, may be brittle in extremely cold temperatures.
  3. Slate Tiles

    • Pros: Elegant and natural appearance, long lifespan, fire-resistant, durable.
    • Cons: Expensive, heavy, requires professional installation due to its weight, can be brittle.
  4. Metal Tiles

    • Pros: Lightweight, durable, energy-efficient, recyclable, available in various styles and colors.
    • Cons: May be more expensive than asphalt shingles, can dent if struck by large objects.
  5. Asphalt Shingle Tiles

    • Pros: Affordable, easy to install, widely available, comes in various styles and colors.
    • Cons: Less durable compared to some other materials, may have a shorter lifespan, can be susceptible to wind and hail damage.
  6. Wood Shake Tiles

    • Pros: Natural and rustic appearance, environmentally friendly, can be energy-efficient.
    • Cons: Requires regular maintenance, may be susceptible to rot, insects, or fire (unless treated), may not be allowed in some fire-prone areas.
  7. Solar Tiles

    • Pros: Harness solar energy for electricity generation, environmentally friendly, can be integrated into the roof.
    • Cons: Generally more expensive than other roofing materials, may have a longer payback period, appearance may not suit every architectural style.

When choosing roof tiles, it’s essential to consider factors such as the local climate, the slope of the roof, budget constraints, and any architectural or homeowner association restrictions. Additionally, proper installation is crucial for the performance and longevity of the roof, so hiring a qualified roofing professional is recommended.

Why Do Tile Roofs Need Cleaning?

Tile roofing needs to be cleaned for a number of reasons. Chief among those reasons is to make the roofing last as long as possible, keep it looking great, and even help catch damage early.  In addition, cleaning helps preserve the underlayment and helps ensure water runs off easily, and quickly.

Makes Roofing Last Longer

Roofing of any type has the job of keeping the water out of your home. The tile on your roof works with the underlayment to achieve this goal.  For the tile and underlayment to last as long as possible cleaning will help prevent algae, mildew, or moss to grow on your tile. The spores associated with those biological growths can literally eat through underlayment if left unattended. If this happens you will be looking at replacing the underlayment on your tile roof.

Helps Roofing Stay Looking Great

It goes without saying that homes which are cared for and receive regular cleanings and upkeep simply look better. Stains from mildew, moss, or algae ruin the look of tile roofing. When your tile is cleaned on a regular basis it makes them last longer and stay looking great! When your roof looks new and attractive your home just looks better and maintains its value better.

Great Chance To Catch Damage Early

Cleaning gives homeowners an opportunity to examine the roof carefully during cleaning. This can help avoid more serious issues with tile roofing such as mold, mildew, leaks, and drafts. When these problems are caught early it costs less to repair them. When the roof is cleaned on a regular basis minor issues will be caught and repaired at significant savings.

How Do I Clean My Tile Roof?

If you’re interested in cleaning your roof yourself you will need the right tools, safety measures, and steps to complete the project. Ensuring that it is easy to get the job done without risking your health makes all the difference in responsible home maintenance.

Tile Roof Cleaning Tools

To clean your tile roof you will need a pressure washer, plywood sections, ladder, cleaning chemicals, sealant, and potentially paint, sealer, replacement tiles, and clothes. Ensure if you choose to clean your tile roof you have the right nozzles for the pressure washer to match your roof and the right chemicals.

Tile Roof Cleaning Safety

Responsible homeownership begins with putting safety first, and that is no different for when you’re working on your roof.  You will need shoes with good traction, distribute your weight carefully on tiles, only step on dry areas, carefully tread on the lower portion of tiles, work by section, and buff the tiles.  In addition, some of the chemicals might be harmful to plants around your home, so make sure they are covered and protected from overspray and runoff during cleaning.

Tile Roof Cleaning Steps

Bring On The Power – The first step is to use your pressure washer to remove debris and the visible dirt from your roof. This includes the common dust we have in the Phoenix area, any twigs, leaves, and dead insects. Work yourself down from the ridge and down towards the gutter. Make sure you let your roof dry completely before you move on to the next step. The PSI setting should be around 1,200 to 1,500 PSI.

Cleaning Chemicals – Reduce the pressure of the power washer to easily and evenly distribute your tile cleaning solution. Let the product seep into the tile’s pores for a few minutes or even until dry.  This gives the chemicals a chance to really dissolve the spores and remove dirt.

Rinse Cycle – Just like anything else you clean with chemicals they need to be effectively removed by rinsing. Sometimes this is the most demanding step of tile roof cleaning, depending on how dirty the roof was. Crank the pressure on your washer back up and aim directly at the stains or stubborn dirt.  Work your way down from the top to the lower section of your roof.

Clean Out Gutters – Once all of the dirt and debris has been removed from the roof it has probably ended up in your gutters. Gutters help prevent erosion around your home’s foundation and if they are clogged with debris water can backup and leak into your roof. Take a moment to remove debris from your gutters.

Buffing Your Tile – Once your roof is completely dry you will want to buff the tile. Not only does this prepare your tile for repainting or sealing but it also gives you a chance to inspect for damage.  This is the step that will help you catch problems while they are small.

Handle Any Repairs – Now is the time to fix any small issues caught during the cleaning of your tile roof.  Just keep in mind that minor damage can lead to leaks.  Leaks into your home might seem like a small problem, but mold is developing in your walls or attic, it can add up to major repairs.  Insulation removal might be necessary and ceiling or walls might need new sheetrock, wiring, and insulation.

Seal & Paint – Depending on the type and style of roofing you have you may need to prime, paint, or seal the roofing tiles. Once your roof is completely clean and all damage is repaired you’re ready to refinish your tile roof. Now you can prime your roof, reseal the tiles, and paint if you so choose.

Phoenix Valley Tile Roof Repair

If you have a home that needs tile roof repair in the Phoenix Valley, we can help! Right Way Roofing, Inc. is a local family owned and operated business who proudly serves communities in the Phoenix area. We offer tile roof repair and as we are in our 3rd generation of roofing contractors we have a wealth of experience and knowledge on repairing tile roofing in Arizona.  We only know one way to fix tile roofing, The Right Way.

Categories

RIGHT WAY ROOFING IS A RESIDENTIAL AND COMMERCIAL ROOFING CONTRACTOR LOCATED IN PHOENIX ARIZONA

Call us TODAY! East Valley: 480-232-5458 or West Valley: 602-299-8851

Winterizing A House And Roof
Roof Repair, Best Roofing Types

Even in Arizona, the cooler winter months can bring challenges to your roof and your home. Costs for repair can quickly become expensive but that can be minimized with a few simple precautionary procedures. Read on to learn more.

Pipe Insulation

Water damage results when water pipes freeze and burst. Avoid flooding and an extensive cleaning proces by ensuring your water pipes are insulated with either fiberglass or heating tape.

Air Leaks

If you can minimize cold air from entering your home, your energy bills should be lower and your home, warmer.  To reduce air leakage, replace or install the sweep at the base of your door and apply weather-stripping or caulk around drafty windows.

Seal The Attic

Sealing the attic not only avoids heat loss but can last many years. Make sure the attic insulation is 12 inches deep and is designed to avoid moisture problems. If your attic ventilation is poor, water vapor generated from bathing, cooking and cleaning can reach the cold underside of a roof deck and condense. If this isn’t properly addressed, moisture build-up could damage your roof deck, insulation and drywall.

Insulate The Attic, Doors And Windows

Winterize your windows so melting snow won’t lead to mold and mildew problems around your windows and doors. Seal up any gaps with weather-stripping seals or caulking to prevent moisture from getting in. Prevent outside air from getting inside your home by installing door sweeps at the bottom of all exterior doors. They’re inexpensive, simple to put on and can keep dust and pests out, too. Also, keep cold air out of your home by sealing window gaps.

Chimney And Furnace Inspection

It’s important to ensure that your heating system is operates safely and effectively. A poorly maintained furnace produces dangerous amounts of carbon monoxide, a colorless and odorless gas causing flu-like symptoms, confusion and even death.  Both should be annually cleaned and inspected by a qualified professional ensuring safe and efficient use. Whether you have an electric, gas or oil system, you should have it serviced yearly, before the main heating season.

Tree Pruning

When allowed to build up, snow and ice damage branches. Large overhanging tree branches are capable of getting heavy with snowfall and break and fall onto your roof. If a tree is close to your home, prune its branches and cut down any low-hanging limbs before the start of the winter. You will want to have those branches trimmed before the snow starts falling. Low-hanging branches can also scrape your roof and damage shingles.

Wind-Proofing Materials

Strong winds can be the cause of substantial damage to your property. Avoid wind damage this winter by installing wind-proofing features such as permanent window shutters and impact-resistant shingles. You may also want to consider purchasing steel doors, as high winds can tear through other types of material more easily.

Right Way Roofing Offers Roof Repairs In Phoenix

If you live in Phoenix, Mesa, Scottsdale, Chandler, Tempe, Apache Junction or anywhere in the Phoenix valley and you have a damaged or leaking roof, Right Way Roofing can help. We can do the work finding the damaged area, recommend the most affordable repairs, and get the job done the Right Way. Roof repair is our business and we strive for the highest customer satisfaction by using the best materials and giving every job our full attention. Give us a call to get your roof repaired by calling 480-232-5458 (East Valley) or 602-299-8851 (West Valley). Learn more about roof repair cost in Phoenix.

Categories

RIGHT WAY ROOFING IS A RESIDENTIAL AND COMMERCIAL ROOFING CONTRACTOR LOCATED IN PHOENIX ARIZONA

Call us TODAY! East Valley: 480-232-5458 or West Valley: 602-299-8851

1 2 3 13